INTRODUCTION
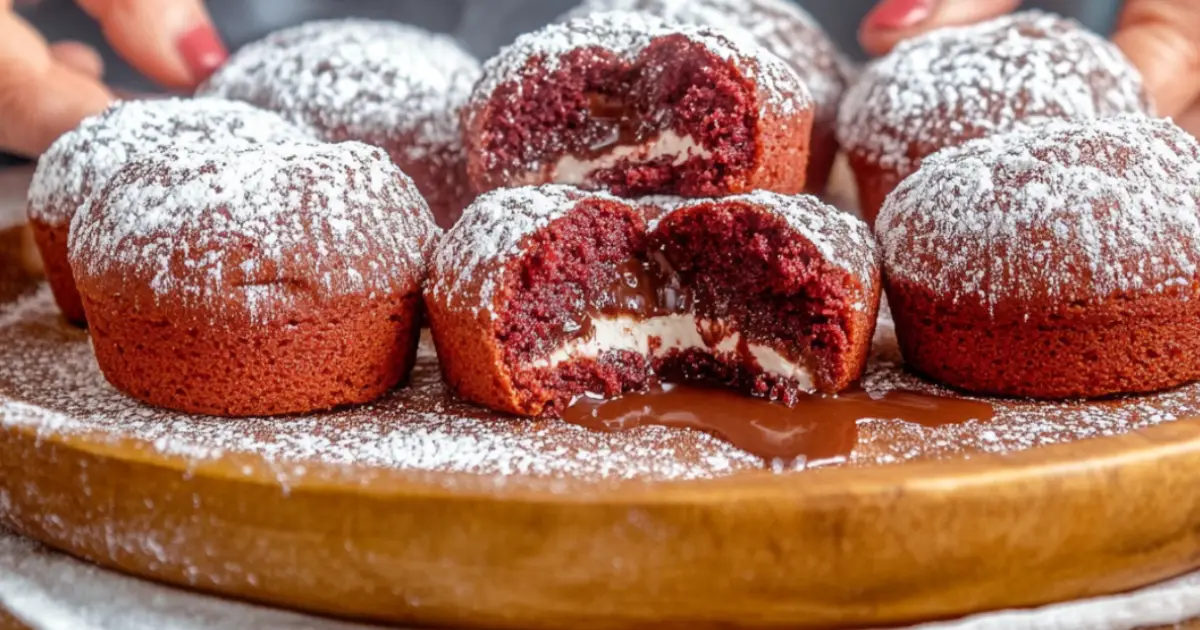
Who doesn’t love a dessert that looks as stunning as it tastes? Picture this: you crack open a warm, soft cake, and out pours a gooey, velvety center that’s just so satisfying. Now, add the irresistible flavor of red velvet to the mix, and you’ve got yourself the perfect indulgence—Molten Red Velvet Cakes! Whether you’re celebrating a special occasion or simply craving something decadent, these little cakes are sure to steal the show.
In this post, we’ll break down exactly how to make these dreamy treats right in your own kitchen. From the rich, moist texture to that perfect molten filling, you’ll be impressing friends and family in no time. Trust me, this recipe is about to become your new go-to dessert. Ready to get started? Let’s dive in!
A Family Tradition: Molten Red Velvet Cakes
Every year, the Johnson family gathers for their annual holiday bake-off, and there’s one dessert that never fails to steal the show: Molten Red Velvet Cakes. What started as a simple attempt to impress Grandma at a Christmas dinner has turned into a family tradition that everyone looks forward to.
Now, years later, the recipe has been passed down through the generations, with each family member adding their personal twist. Some like a hint of cinnamon for extra warmth, while others top theirs with a dollop of whipped cream. But the essence of the molten red velvet cake remains the same: love, warmth, and the joy of sharing something special with the people you cherish most.
Table of Contents
What Makes Molten Red Velvet Cakes So Special?
Let’s be real—there’s something magical about cutting into a warm cake and watching that rich, creamy center slowly ooze out. It’s the kind of dessert that makes you stop mid-bite and just savor the moment. Now, take that classic molten lava cake, but swap the usual chocolate for the smooth, slightly tangy, cocoa-infused goodness of red velvet. That’s exactly what makes Molten Red Velvet Cakes a total game-changer.
The Best of Both Worlds
This dessert combines the best of two favorites: the iconic red velvet cake and the melt-in-your-mouth experience of a molten lava cake. Red velvet’s signature flavor—just a hint of cocoa balanced with a touch of buttermilk—adds depth, while the molten center takes the indulgence to the next level.
That Creamy, Dreamy Center
Now, the real star? That molten core. Instead of the usual chocolate lava, these red velvet cakes hide a warm, gooey cream cheese filling—because let’s be honest, red velvet just isn’t red velvet without cream cheese. The contrast between the soft, fluffy cake and the rich, tangy filling makes every bite dangerously good.
Perfect for Any Occasion
Whether you’re making these for Valentine’s Day, date night, or just a Tuesday that needs a little extra sweetness, these cakes are the perfect way to impress. They’re fancy enough for a dinner party but easy enough to whip up when you’re craving something indulgent. Plus, since they’re baked in individual portions, everyone gets their own personal treat—no fighting over the last bite!
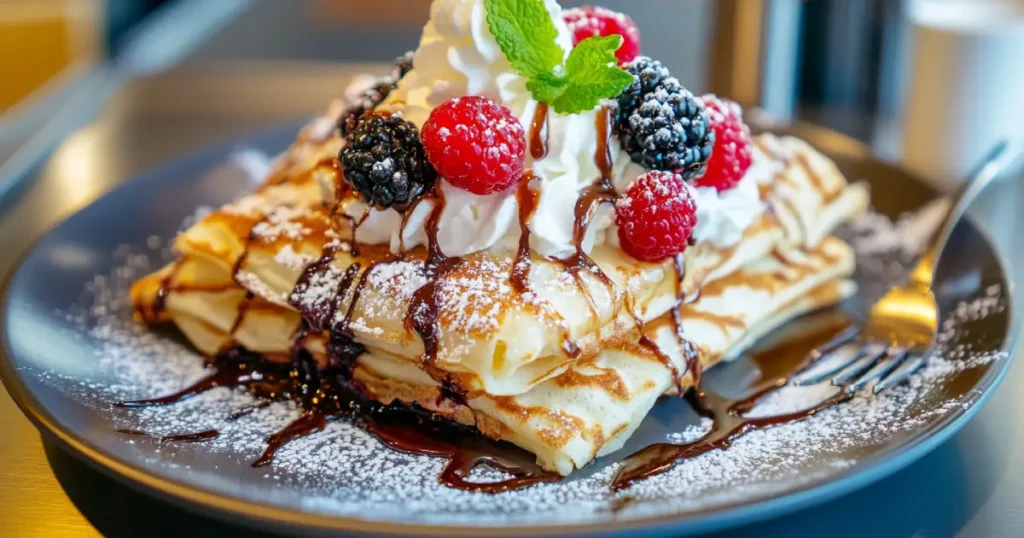
Treat yourself to a delicate and delicious Dessert Crêpes Recipe from Peppery Recipes!
Ingredients You’ll Need for Molten Red Velvet Cakes
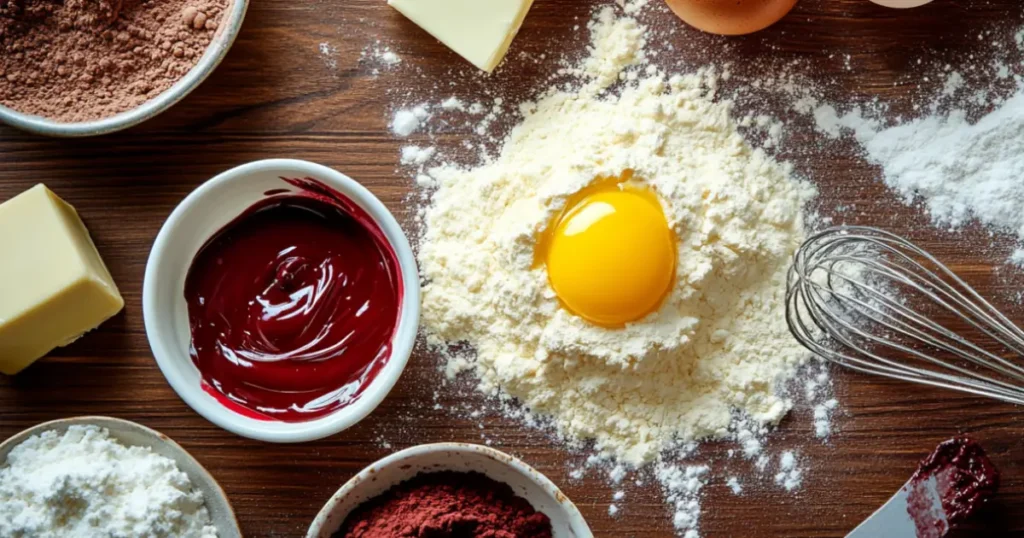
Alright, let’s get down to business—what do you actually need to make these little beauties? The good news is, most of these ingredients are probably already hanging out in your kitchen. But there are a few key ones that really bring that classic red velvet magic to life.
Basic Ingredients for the Cake Batter
- All-purpose flour – The base of any good cake. You want just enough for structure without making it dense.
- Cocoa powder – A little goes a long way! Red velvet isn’t a full-blown chocolate cake, so just a touch of cocoa gives it that signature flavor.
- Granulated sugar – Because, duh, cake needs sweetness.
- Eggs – These help with structure and keep everything moist and rich.
- Unsalted butter – Melted and mixed into the batter for extra richness.
- Buttermilk – This is what gives red velvet that slight tangy flavor and ultra-soft texture. If you don’t have any, you can fake it by adding a teaspoon of lemon juice or vinegar to regular milk.
- Red food coloring – No skipping this! Otherwise, you’re just making a molten chocolate cake. Gel food coloring works best for that deep, vibrant red.
- Vanilla extract – Because everything is better with vanilla.
- Salt – A pinch helps balance out the sweetness.
For the Molten Cream Cheese Center
- Cream cheese – The star of the show. Go for full-fat for the best texture and flavor.
- Powdered sugar – To sweeten things up without making the filling grainy.
- Vanilla extract – A little extra flavor boost.
Optional Toppings (Because More is More!)
- Powdered sugar (for dusting)
- Whipped cream
- Fresh berries (strawberries or raspberries are chef’s kiss)
- Chocolate shavings or drizzle
- A scoop of vanilla ice cream (because why not?)
Step-by-Step Instructions: How to Make Molten Red Velvet Cakes
Alright, now comes the fun part! You’ve got your ingredients, and you’re ready to start baking. Follow these steps, and you’ll have molten red velvet cakes in no time. The best part? These cakes are actually way easier to make than they look. Seriously, anyone can pull this off—no culinary degree required.
1. Preheat Your Oven and Prep the Ramekins
First things first: preheat your oven to 425°F (220°C). You want it nice and hot, so the cakes bake up with that perfect molten center. While that’s warming up, butter and flour your ramekins. This step is crucial because you don’t want your cakes sticking when it’s time to pop them out. If you’re feeling fancy, you can even use a little cocoa powder instead of flour to keep that red velvet theme going.
2. Make the Cake Batter
In a large mixing bowl, start by creaming the butter and sugar together until they’re light and fluffy. This should take about 2-3 minutes with an electric mixer. Then, add the eggs one at a time, mixing well after each addition.
Now, add the buttermilk, vanilla extract, and red food coloring—and don’t be shy with the color! You want that cake to pop.
Next, sift together the flour, cocoa powder, and salt in a separate bowl, then gradually mix it into the wet ingredients. Stir just until everything is combined. Be careful not to overmix; you want it smooth, not tough.
3. Prepare the Molten Center
In a separate bowl, mix together your cream cheese, powdered sugar, and a touch of vanilla extract until smooth. This is going to be the secret, gooey center. You can refrigerate it for a bit if you want it to firm up a little, but you don’t have to—just make sure it’s not too runny.
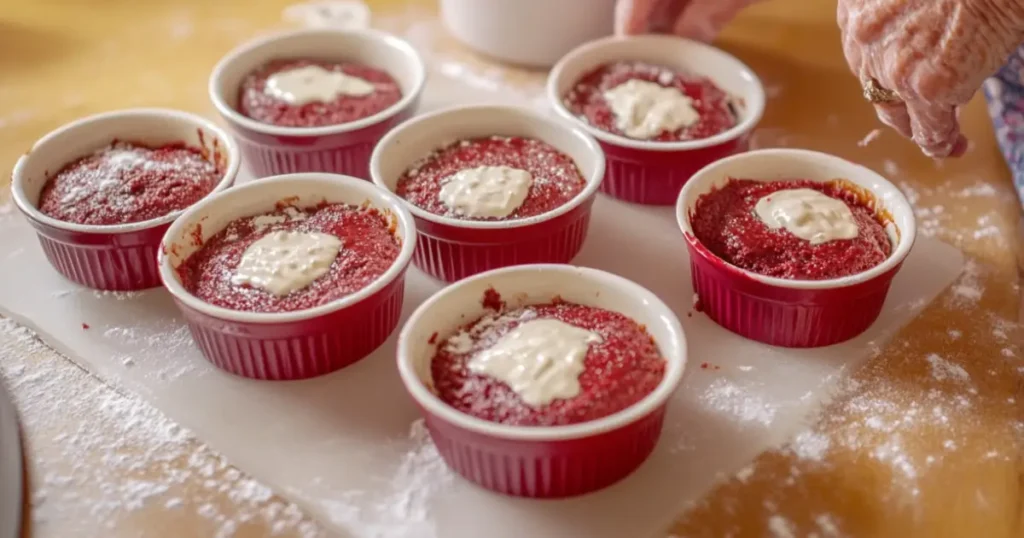
4. Assemble the Cakes
Now comes the fun part! Spoon about 2 tablespoons of the cake batter into the bottom of each buttered ramekin. Then, carefully add about 1 tablespoon of the cream cheese filling right in the center of each ramekin. Finally, top it off with the remaining cake batter, covering the cream cheese completely. You want to make sure it’s fully sealed so that gooey center stays hidden during baking.
5. Bake and Cross Your Fingers
Place your ramekins on a baking sheet and pop them in the oven for 12-14 minutes. You’ll know they’re ready when the edges are set, but the center still looks a bit soft. Don’t worry if it looks slightly underbaked—remember, the magic is in that molten center!
Pro tip: Don’t overbake! If you do, the molten center will turn into just regular cake (still delicious, but not quite the same).
6. Let Them Cool (But Not For Long!)
Once your cakes are done, let them sit for just a minute or two to firm up a bit. Then, carefully run a knife around the edges of each cake, flip the ramekin over, and give it a gentle tap. The cake should slide right out with that molten center waiting to surprise you.
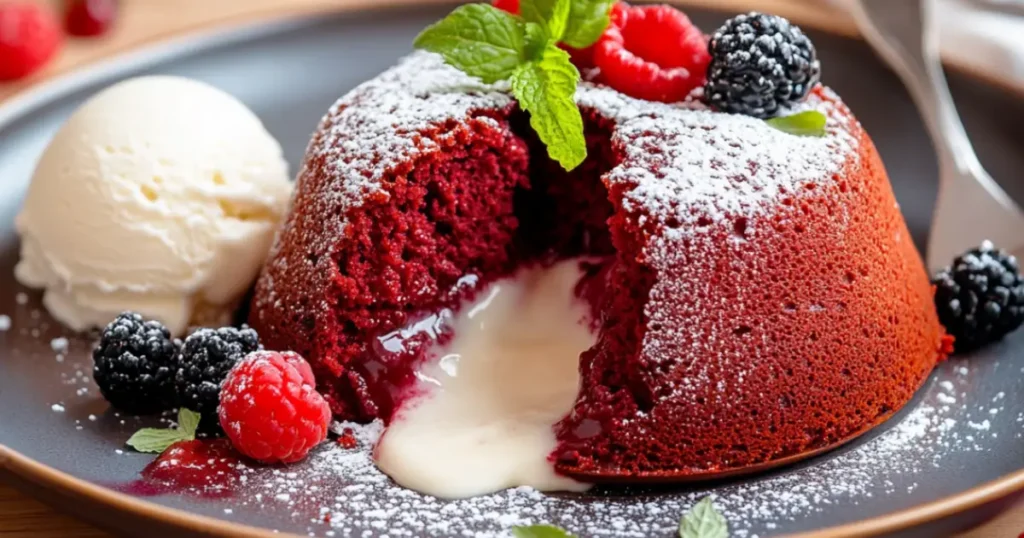
7. Serve and Indulge
Now comes the fun part—serve these molten red velvet cakes with a dusting of powdered sugar, a dollop of whipped cream, and maybe a few fresh berries. If you’re feeling extra, a scoop of vanilla ice cream never hurt anyone. Go ahead, dig in, and enjoy the magic of that molten center.
Enjoy the sweet, nutty goodness of these Pecan Rolls with this easy recipe from Peppery Recipes!
How to Serve Molten Red Velvet Cakes Like a Pro
Once these beauties come out of the oven, it’s time to make them look as good as they taste. Here are some simple ways to take them to the next level:
Stylish Presentation – Serve on cute plates with fancy spoons for extra wow factor.
Powdered Sugar Dusting – A light sprinkle adds sweetness and an elegant touch.
Whipped Cream – The airy texture balances the rich cake perfectly.
Fresh Berries – Strawberries, raspberries, or blueberries add freshness and color.
Vanilla Ice Cream – The contrast of warm cake and cold ice cream? Pure heaven.
Chocolate or Caramel Drizzle – A little extra indulgence never hurt anyone!
Crushed Nuts – Adds crunch and a nutty depth of flavor.
Tips and Tricks for Perfect Molten Red Velvet Cakes
While these molten red velvet cakes are easy to make, there are a few little tips and tricks that can help you nail them every time. Whether you’re a seasoned baker or this is your first time making molten cakes, these pointers will ensure you get that perfect balance of soft cake and gooey center.
1. Don’t Overmix the Batter
When making the cake batter, it’s important not to overmix it. Overmixing can lead to dense cakes, and we’re going for light, tender ones here. Mix just until everything is combined, and you’re good to go. Trust me, less is more when it comes to cake batter.
2. Chill the Cream Cheese Filling
This isn’t mandatory, but chilling the cream cheese filling for about 10-15 minutes before adding it to the batter can help it stay in place and prevent it from melting too much into the cake during baking. It’ll help maintain that perfect molten center.
3. Adjust Baking Time Based on Your Oven
Ovens can vary in temperature, so the baking time might need a little tweaking. Start checking the cakes at around 12 minutes, and keep an eye on them. The key is to have the edges set and the center still jiggly. If the center isn’t as molten as you like, just bake for an extra minute or two—but remember, you don’t want to overdo it!
4. Use Quality Food Coloring
For that vibrant red color, go with gel food coloring rather than liquid food coloring. Gel coloring is more concentrated, so you’ll need less of it, and it gives a deeper, more consistent red hue. Plus, it won’t affect the batter’s consistency.
5. Don’t Overfill the Ramekins
If you fill the ramekins too full, there’s no room for the molten filling to stay inside. Leave about a half-inch at the top so the cake can rise while baking without overflowing.
6. Serve Right Away (But You Can Prep Ahead!)
Molten cakes are best served fresh out of the oven while that gooey center is still flowing. However, if you’re prepping ahead for a dinner party or special occasion, you can assemble the cakes a day or two ahead of time and refrigerate them. Just pop them in the oven right before serving. Keep in mind, they might need a minute or two longer in the oven if they’re cold from the fridge.
7. Try Different Fillings!
While the cream cheese filling is a classic, feel free to get creative with your molten center. Try adding a spoonful of Nutella, melted chocolate, or even a little caramel for a unique twist.
Why Molten Red Velvet Cakes Are the Ultimate Dessert
You might think, “Why make molten red velvet cakes when I can buy dessert?” Simple—because these cakes are next level. Whether it’s a date night, birthday, or just a random Tuesday, they bring a touch of indulgence to any moment.
1. They Look as Good as They Taste
With their deep red color and creamy molten center, these cakes are straight-up stunning. That first cut, when the filling oozes out? Instant “wow” factor.
2. The Perfect Flavor & Texture Combo
Red velvet is rich yet slightly tangy, while the gooey center adds pure decadence. It’s just the right balance—not too heavy, not too sweet.
3. Shockingly Easy to Make
They may look fancy, but they’re surprisingly simple. No complicated steps, no fancy equipment—just mix, bake, and enjoy.
4. Perfect for Any Occasion
Valentine’s Day? Check. Holidays? Check. Random dessert craving? Absolutely. Plus, you can switch up the filling—cream cheese, chocolate, or even caramel!
5. Impresses Every Time
Serve these to guests, and they’ll think you’re a pro. That molten center is pure magic, and no one needs to know how easy they were to make!
6. A Fun Baking Activity
Get the kids involved or make it a baking night with friends. Mixing, baking, and waiting for that molten magic is half the fun!
7. Feels Like a Special Treat
These cakes aren’t your everyday dessert. They make any night feel extra special—because sometimes, you just deserve a little indulgence.
FAQS
What is the Difference Between Molten Cake and Lava Cake?
Honestly, “molten cake” and “lava cake” are often used interchangeably, but there’s a slight distinction! Both refer to the same concept—cakes with a gooey, molten center. However, lava cake is the more commonly used term for a small cake with a warm, flowing center (think of it as a chocolate cake that oozes warm chocolate when you cut into it). Molten cake, on the other hand, can refer to any cake that has that same molten, liquid-like center. So, while all lava cakes are molten cakes, not all molten cakes are lava cakes! Molten cakes can have various flavors like red velvet, chocolate, or even fruit-based fillings, while lava cakes are almost always chocolate.
What Makes Red Velvet Cake Different?
Red velvet cake stands out for its distinctive red color, which is the result of adding food coloring to the batter. But it’s not just about the color—it also has a unique flavor profile! The cake itself is a little tangy, which comes from the combination of buttermilk and a small amount of vinegar. This acidity balances out the sweetness, making the cake taste less sugary than some other cakes. And then there’s the smooth, soft texture, which comes from the combination of oil and buttermilk in the batter. Red velvet cake is also typically paired with a rich cream cheese or buttercream frosting, adding that perfect creamy contrast to the moist cake.
Why Do You Put Vinegar in Red Velvet Cake?
The vinegar in red velvet cake plays a couple of roles. First off, it reacts with the baking soda in the recipe, which helps to leaven the cake and gives it that fluffy texture. But more importantly, the vinegar balances the richness of the oil and the tanginess of the buttermilk, giving the cake its signature flavor. The vinegar doesn’t leave a strong taste behind, but it helps bring out the other flavors and contributes to the cake’s tender, melt-in-your-mouth texture. It’s a key ingredient that really makes red velvet cake unique!
What Flavors Pair Well with Red Velvet?
Red velvet cake has such a rich, indulgent flavor that you can get creative with pairings! Here are some flavors that work great with red velvet:
Cream Cheese: This is the classic pairing! The tangy, rich flavor of cream cheese frosting complements the slight tanginess of red velvet cake perfectly.
Chocolate: A little bit of chocolate (think chocolate ganache, chips, or a drizzle) goes wonderfully with the light cocoa notes in red velvet.
Citrus: A zesty citrus flavor like orange or lemon adds a refreshing contrast to the richness of red velvet cake.
Berries: Fresh fruits like strawberries, raspberries, or blueberries work beautifully as they cut through the sweetness and offer a fresh, tart contrast.
Nuts: Pecans or walnuts can add a lovely crunch and a slightly earthy flavor that pairs nicely with the cake’s richness.
Caramel: The smooth sweetness of caramel complements the tangy cake, adding another layer of indulgence.
Conclusion: Molten Red Velvet Cakes Are the Ultimate Dessert Treat
Molten red velvet cakes are not just a dessert—they’re an experience. Whether you’re celebrating a special occasion or simply treating yourself to something delicious, these cakes offer the perfect balance of rich flavor, light texture, and that irresistible gooey center. From their stunning appearance to their indulgent flavor, they have everything you need to make any meal feel extra special.
With simple ingredients, quick preparation, and endless ways to personalize them, molten red velvet cakes are the go-to dessert for any occasion. So, go ahead and give them a try! With a few thoughtful serving suggestions, you’ll have a showstopper that will wow your friends and family every time. After all, who could resist that warm, chocolatey goodness mixed with the tang of cream cheese, all wrapped up in a perfect little molten cake?
PEOPLE ALSO LOVE